
When setting up solenoids for ARB Airlockers there are a few key things to make sure are setup correctly.
The solenoid consists of several parts including the valve body that has multiple ports. It is crucial that when you
are setting up the locker that your air fittings are installed in the correct port for the solenoid to work correctly.
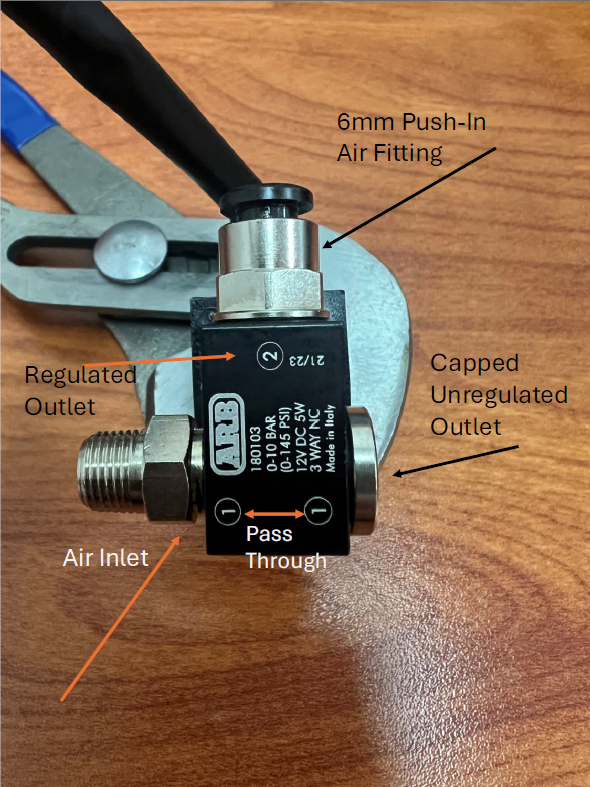
The way that the solenoid is setup in the image on the left
using the #2 port is the correct for when lockers are being
used. This setup is correct for the locker or air triggered
accessory to be activated and deactivated using the toggle
switches.
The locker solenoids can be attached and oriented in
multiple different directions and can be flipped to face the
opposite way. Regardless of the orientation or direction
you need your airline to route, the push-in fitting should
always be plumbed to the number 2 position as that is the
regulated output for use with an on/off switch.
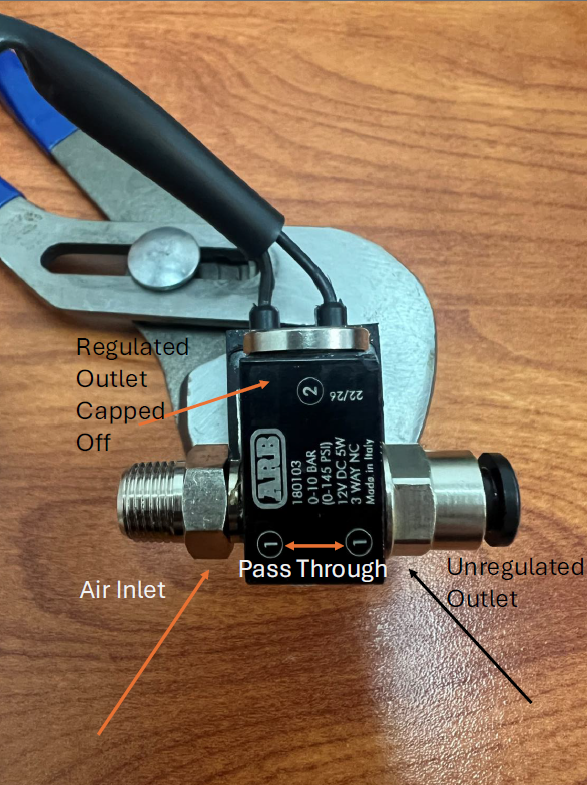
If the push-in fitting is plumbed to the #1 position, it will
send air to the locker as soon as the manifold that the
solenoid is plumbed into comes up to pressure. This means
that even with the locker switch in the off position the
locker will be engaged. The only way to depressurize the
locker in this event is to remove the air line from the
solenoid.
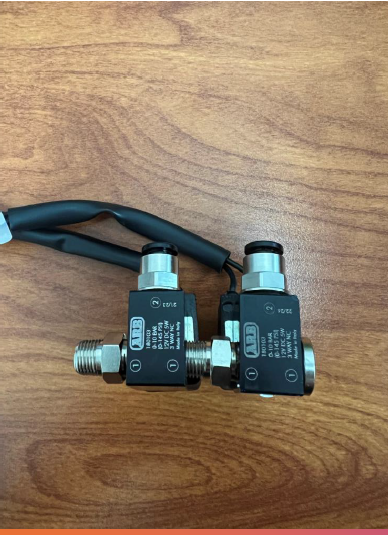
The solenoids can also be stacked using the position 1
inlet/outlet to be used as a piggybacked set-up for running
multiple solenoids from a common manifold outlet. If you
have your solenoids piggybacked, you should always have
your push-in fitting in position 2. Otherwise, you will have
an unregulated airflow and constant pressure to your air
locker when the compressor is on or system is pressurized.
Related to